Honeywell TH3210U2004 Installation Manual: A Comprehensive Plan
This manual details the installation of the Honeywell TH3210U2004 thermostat, covering safety, tools, wiring, and configuration․ It ensures optimal performance and longevity․
The Honeywell TH3210U2004 is a programmable thermostat designed for efficient home climate control․ As a product of Honeywell, a company with a rich history of innovation dating back to 1885, this thermostat embodies a commitment to quality and technological advancement․ Honeywell’s legacy includes pioneering work in instrumentation and control systems, consistently delivering reliable solutions for residential and commercial applications․
This specific model offers users precise temperature management, contributing to energy savings and enhanced comfort․ It’s suitable for various heating and cooling systems, providing adaptable control for diverse home environments․ The TH3210U2004 features a user-friendly interface, allowing for easy programming of temperature schedules and adjustments to suit individual preferences․
This installation manual provides a comprehensive guide to ensure a successful setup, covering everything from safety precautions to detailed wiring instructions․ Proper installation is crucial for maximizing the thermostat’s functionality and ensuring long-term performance․
Understanding the Device’s Functionality
The Honeywell TH3210U2004 thermostat functions as the central control point for your home’s heating and cooling system․ It accurately measures ambient temperature and, based on programmed settings, signals the system to activate or deactivate, maintaining the desired climate․ Its programmable features allow for customized schedules, optimizing energy usage by reducing heating or cooling when the space is unoccupied․
Beyond basic temperature control, the device offers fan settings – auto or on – influencing air circulation․ Compatibility extends to various system types, including conventional and heat pump systems․ The thermostat’s display interface provides real-time temperature readings, setpoints, and operational status․
Understanding the device’s ability to integrate with existing systems is key․ It’s designed to work seamlessly with standard HVAC setups, offering a user-friendly experience․ Proper configuration ensures efficient operation and maximizes the benefits of Honeywell’s innovative technology, contributing to both comfort and cost savings․
Safety Precautions Before Installation
Prior to installing the Honeywell TH3210U2004, always disconnect power to your HVAC system at the breaker box to prevent electrical shock․ This is a critical safety step․ Verify the power is off using a non-contact voltage tester․ Exercise caution when handling wiring, as even seemingly disconnected wires can retain a charge․
If you are unfamiliar with electrical work, consult a qualified HVAC technician․ Incorrect wiring can damage the thermostat and potentially create a fire hazard․ Wear appropriate safety glasses to protect your eyes from dust or debris during installation․
Be mindful of the thermostat’s mounting location, avoiding areas exposed to direct sunlight, drafts, or moisture․ These conditions can affect temperature readings and compromise the device’s accuracy․ Ensure the mounting surface is stable and can support the thermostat’s weight․ Follow all local electrical codes and regulations during the installation process for a safe and compliant setup․
Required Tools and Materials
For a successful Honeywell TH3210U2004 installation, gather the following tools and materials․ You will need a Phillips head screwdriver for mounting the thermostat base and securing wiring connections․ A flathead screwdriver may also be useful for certain terminal screws․ A wire stripper/cutter is essential for preparing thermostat wires, ensuring clean and accurate connections․
A non-contact voltage tester is crucial for verifying power is off before working with wiring․ A level will ensure the thermostat is mounted straight for accurate readings․ Pencils are needed for marking screw holes and wire labels․ Wire connectors (wire nuts) are necessary for joining wires securely․
Additionally, you’ll require the Honeywell TH3210U2004 thermostat itself, mounting screws (typically included), and wire labels for easy identification․ Consider having electrical tape on hand for added insulation and a digital multimeter for troubleshooting if needed․ Finally, refer to the included installation manual for specific wiring diagrams and instructions․
Unpacking and Inspection
Carefully unpack the Honeywell TH3210U2004 thermostat from its packaging․ Begin by visually inspecting the box for any signs of damage during shipping, such as dents, tears, or crushing․ If damage is evident, document it with photographs before opening․ Once opened, verify that all components listed on the packing list are present․
These components typically include the thermostat unit, a mounting baseplate, mounting screws, wire labels, and the installation manual․ Inspect the thermostat itself for any physical defects, like cracks or broken buttons․ Check the wiring terminals on the baseplate to ensure they are intact and not bent․
Confirm the display screen is free from scratches and functions properly during a brief power test (using temporary batteries, if applicable)․ If any parts are missing or damaged, immediately contact Honeywell customer support for replacement before proceeding with the installation․ Retain the original packaging for potential returns or warranty claims․
Mounting Location Considerations
Selecting the appropriate mounting location is crucial for accurate temperature sensing and optimal thermostat performance․ Avoid areas exposed to direct sunlight, drafts, or near heat-generating appliances like lamps or televisions․ These factors can falsely influence temperature readings, leading to inefficient heating or cooling․
The thermostat should be mounted on an interior wall, approximately 5 feet (1․5 meters) above the floor․ This height provides a representative average temperature․ Ensure the location is easily accessible for operation and maintenance, including battery replacement or adjustments․
Avoid mounting the thermostat in hallways or areas with poor air circulation․ A stable wall surface is essential for secure mounting; ensure the wall can support the thermostat’s weight․ Do not install in damp or humid locations, such as bathrooms, as this can damage the internal components․ Consider proximity to existing wiring for simplified installation․
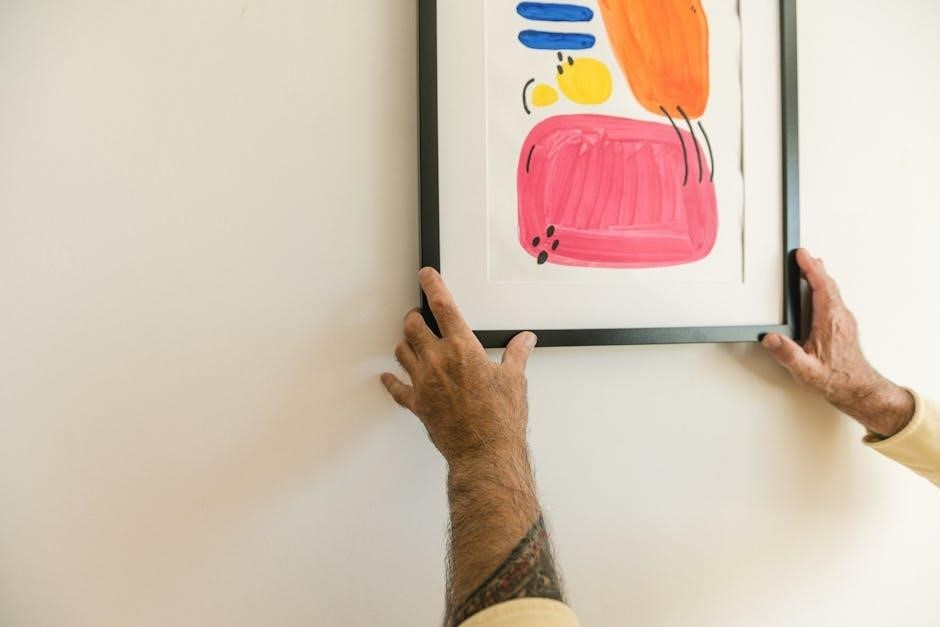
Wall Mounting Procedure

Before commencing, ensure the power to the HVAC system is completely switched off at the breaker․ Using the provided mounting plate, position it on the wall at the desired location, ensuring it’s level using a spirit level․ Mark the screw holes with a pencil․
Drill pilot holes at the marked locations, appropriate for the wall type․ Insert wall anchors if necessary for secure mounting․ Attach the mounting plate to the wall using the supplied screws․ Carefully align the Honeywell TH3210U2004 thermostat with the mounting plate, ensuring the electrical connections will be accessible․
Gently push the thermostat onto the mounting plate until it clicks securely into place․ Verify the thermostat is firmly attached and doesn’t wobble․ Double-check all wiring connections before restoring power․ Improper mounting can lead to inaccurate readings or device malfunction, so precision is key․
Wiring Diagram and Connections
Refer to the detailed wiring diagram included with your Honeywell TH3210U2004․ Typically, connections involve Rh (power), Rc (cooling), W (heating), Y (cooling), G (fan), and C (common wire – essential for consistent power)․ Incorrect wiring can damage the thermostat or your HVAC system․
Identify the corresponding wires from your existing thermostat․ Use wire labels to clearly mark each wire before disconnecting it from the old thermostat․ Connect each wire to the appropriately labeled terminal on the Honeywell TH3210U2004’s backplate․ Ensure each wire is securely inserted into the terminal․
A ‘C’ wire is often required for reliable operation; if absent, a C-wire adapter may be necessary․ Double-check all connections against the wiring diagram before proceeding․ If unsure, consult a qualified HVAC technician․ Securely tighten all terminal screws, but avoid over-tightening to prevent damage․
Power Supply Requirements
The Honeywell TH3210U2004 thermostat generally operates on 24VAC (Volts Alternating Current) power, supplied by your HVAC system’s control transformer․ It’s crucial not to connect the thermostat directly to a 120V or 240V power source, as this will cause immediate and irreparable damage․
A stable and consistent power supply is vital for accurate operation and to prevent unexpected resets or malfunctions․ The ‘C’ wire (common wire) provides this continuous power, and its presence is highly recommended, often essential, for optimal performance․ Without a ‘C’ wire, the thermostat may scavenge power from other circuits, leading to instability․
Verify your HVAC system provides a reliable 24VAC output․ If you experience issues, check the transformer within your furnace or air handler․ If the voltage is insufficient or unstable, consult a qualified HVAC technician for assistance․ Proper power supply ensures the longevity and accuracy of your Honeywell thermostat․
Connecting to Existing Systems
The Honeywell TH3210U2004 is designed for compatibility with most standard 24VAC heating and cooling systems․ However, successful integration requires careful attention to wiring configurations․ Before connecting, thoroughly document your existing thermostat’s wiring, noting each wire’s terminal designation (R, W, Y, G, C, etc․)․
If your system utilizes a heat pump, ensure the wiring matches the heat pump configuration – specifically, identifying the reversing valve wire (O/B)․ Incorrect wiring can lead to improper system operation or damage․ Systems with multiple stages of heating or cooling will require connecting the appropriate stage wires to the corresponding terminals on the TH3210U2004․

For systems lacking a ‘C’ wire, a ‘C’ wire adapter may be necessary․ Follow the adapter’s instructions carefully․ Always double-check all connections before powering on the system․ If unsure, consult a qualified HVAC professional to ensure correct and safe integration with your existing setup․
Initial Power-Up and Testing
After completing the wiring connections, restore power to the HVAC system at the breaker․ The Honeywell TH3210U2004 should power on and display the welcome screen․ Verify the display is functioning correctly and is clearly visible․ If the screen remains blank, re-check all wiring connections and the power supply․
Initiate a test cycle for both heating and cooling․ Set the thermostat to ‘Heat’ and raise the temperature significantly above the room temperature․ Confirm the heating system activates․ Then, set the thermostat to ‘Cool’ and lower the temperature below the room temperature to verify cooling system operation․
Observe the system for any unusual noises or behaviors during testing․ Ensure the fan operates correctly in both ‘Auto’ and ‘On’ modes․ Document any issues encountered during testing for troubleshooting purposes․ If problems persist, consult the troubleshooting section of this manual or contact Honeywell support․
Thermostat Configuration Settings
The Honeywell TH3210U2004 offers customizable settings to optimize performance and comfort․ Access the configuration menu via the ‘Menu’ button on the thermostat interface․ Begin by verifying the system type – furnace, heat pump, or boiler – is correctly selected․ Incorrect selection can lead to improper operation․
Configure the temperature scale (Fahrenheit or Celsius) according to your preference․ Adjust the swing/cycle rate settings to control the temperature differential before the system cycles on or off․ A smaller swing rate provides more consistent temperatures, while a larger rate reduces system wear․
Explore advanced settings like anticipator heat settings (for furnaces) and minimum run time to prevent short cycling․ Familiarize yourself with the options for fan control, including ‘Auto’ and ‘On’ modes․ Save all changes before exiting the configuration menu to ensure proper implementation․

Setting the Date and Time
Accurate date and time settings are crucial for proper scheduling and operation of your Honeywell TH3210U2004 thermostat․ To begin, navigate to the ‘Menu’ option on the device’s display․ Within the menu, locate and select the ‘Date/Time’ setting․ You’ll typically be presented with separate options for setting the year, month, and day․
Use the up and down arrow buttons to adjust each value until the correct date is displayed․ Confirm your selection by pressing the ‘Select’ or ‘Enter’ button․ Repeat this process for setting the time, adjusting the hour and minute accordingly․ Ensure you also verify the AM/PM setting is correct․
Some models may offer an option to automatically synchronize the time via internet connection if connected to a compatible system; Save the changes to finalize the date and time configuration․
Programming Temperature Schedules
The Honeywell TH3210U2004 allows for customized temperature schedules to optimize comfort and energy savings․ Access the ‘Schedule’ option within the main menu․ You’ll likely find pre-programmed schedules like ‘Wake,’ ‘Leave,’ ‘Return,’ and ‘Sleep,’ which you can modify or create new ones․
To edit a schedule, select the desired period and adjust the temperature setting using the arrow buttons․ You can also set the start time for each period․ For example, program a lower temperature during ‘Sleep’ and a comfortable temperature for ‘Wake․’
Many models support different schedules for weekdays and weekends․ Explore the options to create a personalized schedule that aligns with your lifestyle․ Remember to save your changes after each adjustment․ Utilizing schedules effectively can significantly reduce energy consumption and enhance your home’s comfort․
Understanding the Display Interface
The Honeywell TH3210U2004 features a user-friendly display interface designed for easy operation․ The primary screen typically shows the current room temperature, set temperature, and operating mode (Heat, Cool, Auto, Off)․ Icons indicate active functions like fan operation or schedule mode․
Navigation is usually achieved through a combination of buttons – often ‘Menu,’ ‘Up,’ ‘Down,’ and ‘Enter’ or ‘Select․’ The ‘Menu’ button accesses the main settings, while ‘Up’ and ‘Down’ allow scrolling through options․ ‘Enter’ confirms selections․
Pay attention to smaller icons that may indicate Wi-Fi connectivity, battery level (if applicable), or system status․ The display may also show the current day and time․ Familiarizing yourself with these elements will streamline thermostat control and troubleshooting․ A clear understanding of the display is crucial for efficient operation․
Navigating the Menu Options
Accessing the Honeywell TH3210U2004’s menu is typically done by pressing the ‘Menu’ button․ This reveals a list of configurable settings, often including ‘Schedule,’ ‘System,’ ‘Settings,’ and potentially ‘Information․’ Use the ‘Up’ and ‘Down’ arrow buttons to scroll through these options․
Within ‘Schedule,’ you can program temperature settings for different times of day and days of the week․ ‘System’ usually allows adjustments to heating and cooling parameters, fan control, and swing settings․ ‘Settings’ often contains options for date/time configuration, display brightness, and temperature units (°F or °C)․
Selecting an option with the ‘Enter’ or ‘Select’ button drills down into submenus․ Use the arrow buttons again to navigate within these submenus, and ‘Enter’ to confirm changes․ Remember to save any modifications before exiting a menu to ensure they are applied․ Careful menu navigation is key to customizing your thermostat․
Adjusting Fan and System Settings
Within the ‘System’ menu, you’ll find options to configure your heating and cooling system․ ‘Heat’ allows selection between Auto, On, and Off modes․ ‘Cool’ offers similar choices for cooling operation․ ‘Auto’ mode automatically switches between heating and cooling to maintain the set temperature․
Fan control settings typically include ‘Auto’ and ‘On․’ ‘Auto’ runs the fan only during heating or cooling cycles, while ‘On’ keeps the fan running continuously for improved air circulation․ ‘Swing’ settings, if available, control the movement of the air vent․ Adjusting these settings optimizes comfort and energy efficiency․
Carefully review the compatibility of these settings with your specific HVAC system․ Incorrect configurations can lead to inefficient operation or system malfunctions․ Always consult a qualified HVAC technician if you are unsure about any setting․
Troubleshooting Common Issues
If the thermostat displays “No Power,” verify the power supply connection and circuit breaker․ A blank display often indicates a power issue․ For “Heating/Cooling Not Responding,” check the system switch position (Heat, Cool, Auto) and ensure the set temperature is appropriately adjusted․
If the temperature reading seems inaccurate, confirm the thermostat isn’t exposed to direct sunlight or drafts․ Recalibration might be necessary․ A constantly running fan could signify a ‘Fan On’ setting; switch to ‘Auto’ to resolve this․ Error codes, detailed in the ‘Error Code Interpretation’ section, provide specific diagnostic information․
Before attempting complex troubleshooting, ensure all wiring connections are secure․ If issues persist, consult a qualified HVAC technician․ Avoid disassembling the thermostat beyond the specified maintenance procedures, as this may void the warranty․
Error Code Interpretation
The Honeywell TH3210U2004 utilizes error codes to signal specific malfunctions․ Code “E1” typically indicates a sensor failure, requiring sensor replacement․ “E2” suggests a communication error between the thermostat and the controlled system; check wiring connections․ A “E3” code often points to a low battery, even with a functional power supply – replace the batteries promptly․
“E4” signifies a heating or cooling system lockout, potentially due to safety limits being triggered․ Inspect the system for obstructions or faults․ “E5” indicates an incorrect temperature sensor reading, necessitating recalibration or replacement․ Refer to the full error code list within the manual for a comprehensive understanding․
Always document the error code before attempting any repairs․ If an error persists after troubleshooting, contact a qualified HVAC professional for assistance․ Ignoring error codes can lead to system damage or inefficient operation․
Factory Reset Procedure
Performing a factory reset on the Honeywell TH3210U2004 restores the thermostat to its original default settings․ This is useful for troubleshooting persistent issues or preparing the device for a new installation․ To initiate the reset, navigate to the ‘Settings’ menu using the thermostat’s interface․
Within ‘Settings’, locate the ‘Reset’ or ‘Factory Defaults’ option․ Confirm your selection, as this will erase all personalized programming, including schedules, temperature preferences, and network configurations․ The thermostat will then restart, displaying the initial setup screen․
Be aware that a factory reset requires complete re-configuration of the thermostat․ Ensure you have access to your system’s wiring information and desired settings before proceeding․ This process does not affect physical wiring; it only clears the stored software configurations․ Consult the full manual for detailed step-by-step instructions and visual aids․
Maintenance and Filter Replacement
Regular maintenance ensures the Honeywell TH3210U2004 operates efficiently and accurately․ While the thermostat itself doesn’t have user-replaceable filters, maintaining the air filter in your HVAC system is crucial for its performance․ A dirty air filter restricts airflow, potentially causing inaccurate temperature readings and increased energy consumption․
Check your HVAC system’s air filter monthly, and replace it every 1-3 months, depending on usage and environmental conditions․ Use a filter with the recommended MERV rating for your system․ Periodically clean the thermostat’s exterior with a soft, dry cloth․ Avoid using liquids or abrasive cleaners․
Inspect the wiring connections annually to ensure they remain secure․ If you notice any corrosion or damage, consult a qualified HVAC technician․ Proper filter maintenance and occasional cleaning contribute to the longevity and reliable operation of both the thermostat and your entire heating and cooling system․

Cleaning the Device
To maintain the appearance and functionality of your Honeywell TH3210U2004 thermostat, regular cleaning is recommended․ Always begin by completely disconnecting power to the thermostat at the breaker box before any cleaning procedure․ This prevents electrical shock and potential damage to the unit․
Use a soft, dry microfiber cloth to gently wipe down the thermostat’s display and casing․ Avoid applying excessive pressure to the screen․ For stubborn smudges, lightly dampen the cloth with water – never spray liquid directly onto the device․ Do not use abrasive cleaners, solvents, or strong detergents, as these can damage the plastic and screen․
Pay particular attention to cleaning around the edges and buttons․ Ensure no dust or debris accumulates in these areas․ After cleaning, allow the thermostat to dry completely before restoring power․ Consistent, gentle cleaning will keep your TH3210U2004 looking its best and functioning optimally for years․
Long-Term Storage Guidelines
If you need to store your Honeywell TH3210U2004 thermostat for an extended period, proper preparation is crucial to prevent damage and ensure future functionality․ Begin by completely disconnecting the thermostat from all power sources and removing any batteries․ Thoroughly clean the device following the guidelines in the ‘Cleaning the Device’ section of this manual․
Pack the thermostat in its original packaging, if available․ If not, use a sturdy cardboard box and plenty of cushioning material – bubble wrap or packing peanuts are ideal – to protect it from physical shock during storage․ Store the thermostat in a cool, dry environment, away from direct sunlight, extreme temperatures, and humidity․
Avoid storing the thermostat in areas prone to dust or pests․ Periodically check the storage location to ensure conditions remain suitable․ Following these guidelines will help preserve the thermostat’s condition and ensure it’s ready for use when needed, extending its lifespan considerably․
Honeywell Company Overview
Honeywell International Inc․, a diversified technology and manufacturing leader, boasts a rich history dating back to 1885․ Founded in the United States, the company has consistently driven innovation across numerous industries, including aerospace, building technologies, performance materials, and safety and productivity solutions․
Honeywell’s commitment to creative technologies and strong leadership has solidified its position as a global frontrunner․ The company’s building technologies division, responsible for products like the TH3210U2004 thermostat, focuses on creating smarter, safer, and more sustainable environments․
With a dedication to quality and customer satisfaction, Honeywell continually invests in research and development․ This ensures its products remain at the forefront of technological advancement․ Honeywell’s broad product range reflects its diverse expertise and commitment to addressing complex challenges worldwide, offering solutions for homes, businesses, and industries alike․
History of Honeywell Innovations
Honeywell’s innovative spirit stretches back to its 1885 origins, initially focused on temperature regulation with the development of the mercury thermostat․ This foundational technology paved the way for decades of advancements in building control systems․ Throughout the 20th century, Honeywell played a pivotal role in aerospace innovation, contributing significantly to navigation and control systems for aircraft and space exploration․
The company’s evolution included key mergers and acquisitions, strengthening its technological capabilities․ Honeywell’s commitment to research led to breakthroughs in materials science, automation, and safety technologies․ This dedication extends to modern smart home solutions, like the TH3210U2004 thermostat, designed for energy efficiency and user convenience․
Honeywell consistently adapts to evolving needs, pioneering solutions for industrial automation, environmental sustainability, and enhanced security․ Its legacy is built on a continuous pursuit of innovation, shaping industries and improving lives globally․
Honeywell Product Range (Related Devices)
Beyond the TH3210U2004, Honeywell offers a comprehensive suite of home comfort and security solutions․ This includes the Honeywell Home series of smart thermostats, such as the T9 and T10 Pro Smart Thermostats, providing advanced features like geofencing and customized scheduling․
For air quality, Honeywell manufactures air purifiers like the KJ900 series, designed to remove allergens, dust, and odors․ Their range of security systems encompasses indoor and outdoor cameras, door/window sensors, and complete alarm kits, all integrated through the Honeywell Home app․
Furthermore, Honeywell provides whole-house humidifiers and water leak detectors, contributing to a safer and more comfortable home environment․ Related professional-grade systems, like the Experion PKS, demonstrate Honeywell’s broader capabilities in industrial control and automation․ These products showcase Honeywell’s commitment to integrated home solutions․
Comments